Authorize.net
Fees
One-time: $75.00
OR
Monthly: $6.99
Plugin Info
Category: Payment gateway
Size: 0 kg
Plugin ID: 26
Requires CMS Version: 3.9.0
Receive payments through the Authorize.net payment gateway with this nifty cart checkout page integration.
Receive payments through the Authorize.net payment gateway with this nifty cart checkout page integration.
How to install Authorize.net Plugin
To upload and install Authorize.net Plugin, simply follow standard plugin installation procedures
How to use Authorize.net Plugin
-
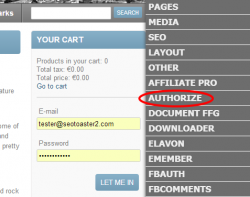
Download the plugin and install it on your site. After it is installed, you will see it in the menu on the right.

After the plugin installation is completed you will be offered to purchase the license for it. With the license you will have access to the plugin configuration screen.
If you want to use authorize on your website you have 2 ways to do this. You can allow payments right on your checkout page or put a button that will redirect customers to checkout page on authorize.net. -
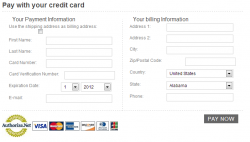
If you want your users to pay right on your website put this shortcode
{ $plugin:authorize:payment}into html code of your checkout template.
This will add the following authorize checkout form to the page. -
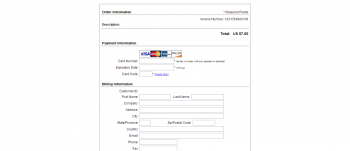
If you want your users to go to authorize.net and pay there you can put this shortcode
{ $plugin:authorize:button}into html code of your checkout page. This will add a button that redirects users to authorize.net.You will also need to add a valid Response/Receipt URL:
Log into the Merchant Interface at account.authorize.net.
- Click Account from the main toolbar.
- Click Response/Receipt URLs under
- Transaction Format Settings.
- Click Add URL.
- Enter your Response URL.
- Click SubmitResponse URL example: web-site-url.com/plugin/authorize/run/success/
- Then go to authorize section of admin menu and enter your 'api login id' and 'transaction key' for payments via 'secure checkout', or if you want to use direct credit card payment on your website put a server path to your certificate in 'certificate path'.
- In order to get your 'api login id' and 'transaction key' log in to your merchant account at authorize.net (you can sign up for a new account if you do not have one) and proceed to Account->Settings-> Security Settings->API Login ID and Transaction Key there.
-
The certificate path should look like this: /home/your_user/web_directory/your_website/plugins/authorize/ssl/your_certificate. If the path is correct, you will see «The path to the file is OK» message.
Example


